
Replacing the shower door bottom guide ensures smooth operation, preventing wobbling and misalignment. This small but crucial part keeps the door stable and aligned, enhancing overall functionality and durability.
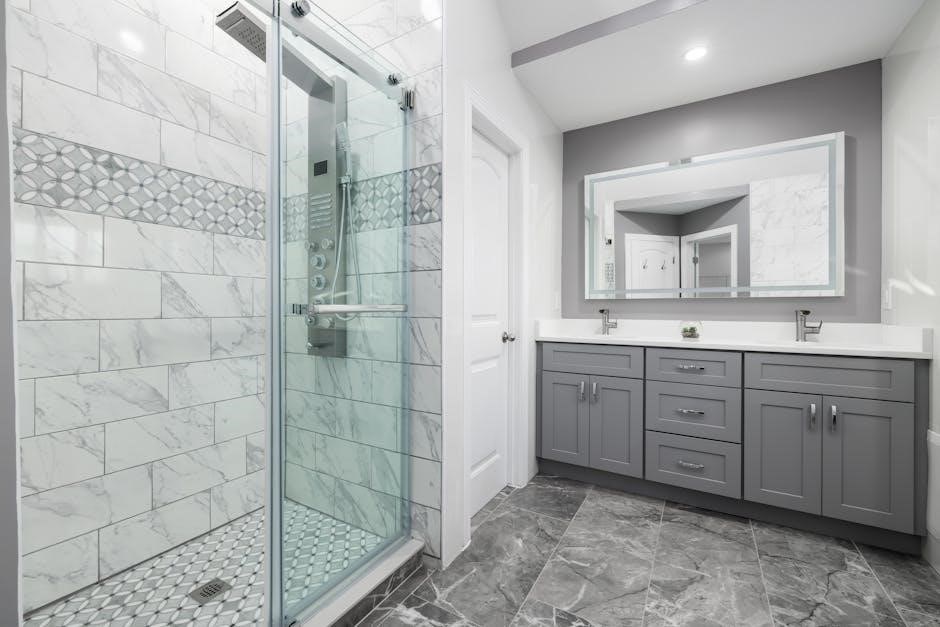
What is a Shower Door Bottom Guide?
A shower door bottom guide is a crucial component that ensures the door’s stability and alignment as it slides. Typically made of durable materials like stainless steel or plastic, it prevents wobbling and misalignment, aiding smooth operation. The guide often includes rollers or wheels that glide along a track, keeping the door on course. Its primary function is to maintain the door’s proper movement, preventing water leakage and ensuring efficient functionality. Regular maintenance and prompt replacement when worn are essential for longevity and optimal performance.
The Importance of the Bottom Guide
The bottom guide plays a vital role in maintaining the stability and alignment of the shower door. It ensures the door slides smoothly, preventing wobbling and misalignment. By keeping the door properly positioned within the track, the bottom guide minimizes water leakage and reduces wear and tear on other components. A functional bottom guide enhances the overall performance of the shower door, making it safer and more convenient to use. Regular inspection and maintenance of this component are essential to uphold its effectiveness and extend the door’s longevity.
Why Replace the Shower Door Bottom Guide?
Replacing the bottom guide prevents door misalignment, wear on rollers, and water leakage. It ensures smooth operation, enhances stability, and maintains the door’s overall functionality and longevity effectively.
Common Issues with the Bottom Guide
The bottom guide often faces problems like misalignment, worn-out rollers, and damage from moisture. Over time, it can crack or break, causing the door to wobble or come off track. Dirt buildup may also hinder smooth movement, while rust or corrosion can weaken its structure. Additionally, improper installation or excessive wear can lead to malfunction, making the shower door difficult to operate. Addressing these issues promptly ensures the door functions correctly and maintains its durability.
Signs That the Bottom Guide Needs Replacement
If the shower door wobbles, scrapes, or struggles to slide smoothly, it may indicate the bottom guide is failing. Visible cracks, breaks, or rust on the guide are clear signs of needed replacement. Additionally, if the door frequently comes off track or misaligns, the bottom guide is likely worn out. Difficulty in opening or closing the door, along with excessive noise, are also key indicators. Addressing these issues promptly prevents further damage and ensures the door operates safely and efficiently.

Tools and Materials Needed
Gather essential tools like screwdrivers, pliers, and Allen wrenches. Materials include a new bottom guide, screws, lubricant, and cleaning supplies to ensure a smooth replacement process.
Essential Tools for the Job
To replace the shower door bottom guide, you’ll need a Phillips-head screwdriver, pliers, and an Allen wrench. Additional tools include WD-40 for loosening screws, a utility knife for cleaning, and safety gloves for protection. A level ensures proper alignment, while a screwdriver and putty knife may be useful for removing old adhesives. Having these tools ready will streamline the process and help you complete the replacement efficiently.
Materials Required for Replacement
The primary material needed is a new shower door bottom guide, available in durable materials like stainless steel or plastic; Additional materials include a replacement seal for the door’s bottom edge to prevent water leakage. Silicon-based adhesive or double-sided tape may be required to secure the new guide. Ensure the replacement guide matches your door’s model for compatibility. Purchasing a guide from trusted manufacturers, such as the WRS WT Industries Bottom Sash Guide, ensures longevity and smooth operation.
Safety Precautions
Always wear gloves and protective eyewear when handling tools. Ensure the door is securely supported to avoid accidental drops. Work in a well-lit area.
Preparation and Safety Tips
Before starting, gather all necessary tools and materials. Clear the workspace and cover the floor to protect it from debris. Wear gloves, safety glasses, and ensure good ventilation. Disconnect water supply if needed. Use a suction lifter for heavy doors and consider having someone assist. Keep a non-slip mat in the shower for stability. Regularly inspect and clean the area to prevent slipping hazards. Proper preparation ensures a smooth, accident-free replacement process.
Removing the Shower Door
Start by retracting the rollers and removing the head stop. Tilt the door carefully and lift it off the track, ensuring safe handling to avoid damage.
Step-by-Step Door Removal Process
Begin by loosening the roller adjustment screws at the bottom of the door frame. Turn them counterclockwise to fully retract the rollers. Next, remove the head stop at the top of the frame by unscrewing it. Carefully tilt the top of the door toward you and lift it off the bottom track. Place the door on padded sawhorses to prevent damage. This process ensures safe handling and access to the bottom guide for replacement or repair.
Handling the Door Safely
When removing the shower door, always handle it with care due to its weight and fragility. Use gloves to maintain a firm grip and prevent slipping. Ensure the area is clear of obstacles to avoid accidents. Place the door on padded sawhorses or a soft surface to prevent scratching or breaking. Never lift the door alone; consider enlisting assistance to ensure safety and control. Proper handling prevents damage to both the door and surrounding areas, ensuring a smooth replacement process and minimizing risks of injury or further repairs.
Inspecting the Bottom Guide and Rollers
Inspect the bottom guide for cracks or breaks and check the rollers for smooth movement. Ensure proper alignment and look for signs of wear or corrosion that may affect functionality.
Identifying Wear and Tear
Identify wear and tear by visually inspecting the bottom guide for cracks, breaks, or rust. Check for misalignment and smoothness of rollers, ensuring they move without obstruction. Look for signs of moisture damage or corrosion that may weaken the guide’s structure. If the guide is loose or the rollers are worn, replacement is necessary to maintain proper door function and prevent further damage. Regular inspection helps in addressing issues early, ensuring the shower door operates seamlessly.
Assessing Roller Condition
Assess the rollers by checking for wear, rust, or misalignment. Smooth operation depends on their condition. Look for signs of damage or corrosion, as these can hinder door movement. Use a screwdriver to test roller mobility, ensuring they roll freely without resistance. Clean rollers regularly to remove debris and ensure proper function. If rollers are damaged or worn, replace them promptly to maintain smooth door operation. Durable materials like stainless steel can extend roller lifespan, preventing frequent replacements and ensuring reliable performance over time.
Cleaning the Shower Door and Track
Clean the shower door and track by removing soap scum and mildew. Use a mixture of baking soda and vinegar for effective cleaning, ensuring smooth door operation.
Preparing the Area for Installation
Before installing the new shower door bottom guide, ensure the area is clean and dry. Remove any soap scum, mildew, or hard water stains from the door and track using a mixture of baking soda and vinegar. Rinse thoroughly and dry with a clean towel to prevent water spots. Clear the workspace around the shower to avoid tripping hazards. Once the area is prepared, align the new guide with the track, ensuring proper fit and alignment before securing it in place for smooth door operation.
Removing the Old Guide
To remove the old shower door bottom guide, start by uninstalling the shower door for easier access. Locate the screws securing the guide to the track and unscrew them using a screwdriver. Gently pry the guide away from the track, taking care not to damage the surrounding area. If the guide is stubborn, apply a small amount of WD-40 to loosen it. Once removed, inspect the track for any debris or residue and clean it thoroughly to prepare for the new guide installation.
Aligning and Securing the New Guide
Align the new shower door bottom guide with the track, ensuring it fits seamlessly. Secure it by tightening the screws firmly but avoid overtightening, which might damage the track. Double-check the alignment to ensure the guide is straight and level. Once secured, test the door’s movement by sliding it back and forth to confirm smooth operation. Proper alignment and secure fastening are crucial for the door to function effectively and prevent future issues.

Reinstalling the Shower Door
Gently place the shower door back onto the track, ensuring it aligns properly with the new bottom guide. Secure it firmly and test its smooth operation.
Placing the Door Back on the Track
To reinstall the shower door, carefully tilt it and align the bottom edge with the new guide. Gently lower it onto the track, ensuring it fits securely. Open and close the door a few times to confirm smooth movement. Adjust the rollers if necessary to ensure proper alignment and balance. Use a second person for support if needed, as the door can be heavy. Once the door is in place, test its operation to ensure it glides effortlessly without wobbling or misaligning.
Adjusting Rollers for Proper Alignment
After reinstalling the shower door, fine-tune the rollers by loosening the adjustment screws with a screwdriver. Turn the screws clockwise to lower the rollers or counterclockwise to raise them. Ensure the door is level and aligned evenly with the frame. Test the door’s movement by sliding it open and closed. If it wobbles or doesn’t glide smoothly, adjust the rollers slightly and test again. Proper alignment ensures smooth operation and prevents the door from coming off the track. Make incremental adjustments for optimal results.

Troubleshooting Common Issues
Common problems include misalignment, worn-out rollers, or dirt accumulation. Regular cleaning and inspections help identify issues early, ensuring smooth operation and preventing further damage.
Misalignment and Adjustment Tips
Misalignment is a common issue causing the door to close improperly or scrape. To fix this, adjust the rollers by turning the adjustment screws counterclockwise. This allows the door to realign with the track. After adjustments, open and close the door to ensure smooth movement. If the door still wobbles, check the roller condition and clean the track of debris. Proper alignment ensures the door glides effortlessly, preventing further damage to the guide or rollers.
Ensuring Smooth Door Operation
Post-installation, test the door by sliding it open and closed multiple times. Ensure it moves effortlessly without sticking or wobbling. Regular lubrication of rollers and cleaning the track prevents friction buildup. Check the bottom guide’s alignment with the track to maintain stability. Address any minor adjustments promptly to avoid further issues. Consistent maintenance ensures the door operates smoothly, providing reliable performance and longevity to the system.

Maintenance Tips for Longevity
Regular cleaning of the track and bottom guide prevents dirt buildup. Lubricate rollers periodically to ensure smooth operation and extend the system’s lifespan.
Regular Cleaning and Inspection
Regular cleaning and inspection are essential for maintaining the shower door bottom guide’s functionality. Use a mild detergent and a soft brush to remove dirt and mineral buildup from the track and guide. Inspect the guide for signs of wear, such as cracks or rust, and replace it if necessary. Clean the rollers and lubricate them periodically to ensure smooth operation. Regular maintenance prevents corrosion and extends the lifespan of the shower door system, ensuring it operates smoothly and efficiently over time.
Preventative Measures
Implementing preventative measures can significantly extend the life of your shower door bottom guide. Regularly lubricate the rollers and clean the track to reduce friction and prevent corrosion; Avoid using harsh chemicals that might damage the guide or surrounding materials. Ensure the door is properly aligned and adjusted to prevent unnecessary strain on the bottom guide. Additionally, inspect the guide periodically for signs of wear and address any issues promptly before they escalate. These simple steps can help maintain smooth door operation and prevent costly repairs down the line.
When to Call a Professional
If the bottom guide is severely damaged, misaligned, or the door is heavy, consult a professional to avoid further damage or safety risks.
Knowing Your Limits
Recognizing when a task exceeds your DIY skills is crucial. If the bottom guide replacement involves complex adjustments or heavy lifting, it’s wise to seek professional help. Amateur attempts can lead to improper installations, causing safety hazards or further damage. Professionals have the expertise and tools to handle tricky situations efficiently, ensuring the job is done right. Don’t hesitate to call in a expert if you’re unsure about any step of the process.
Replacing the shower door bottom guide is a manageable task with the right tools and knowledge. Proper installation ensures smooth door operation and enhances bathroom functionality. Stay confident and proactive in maintaining your shower door system for long-term efficiency and safety.
Final Thoughts and Encouragement
Replacing the shower door bottom guide is a simple yet impactful task. It not only ensures smooth door operation but also prevents potential damage to the entire system. By following the steps outlined, you can enhance the functionality and longevity of your shower door. Remember, regular maintenance and prompt replacements are key to avoiding costly repairs. Stay proactive and confident in your ability to tackle this project, ensuring a safe and efficient bathroom experience for years to come.
Leave a Reply