
HardiePlank‚ a popular choice in Norway via FINN.no for home improvements‚ offers durable‚ pre-primed cement-fiber siding. It’s a fantastic option for renovations!
What is HardiePlank?
HardiePlank siding represents a revolutionary advancement in exterior home cladding‚ diverging from traditional wood‚ vinyl‚ or aluminum options. Crafted from a composite of cement‚ sand‚ and cellulose fibers‚ it delivers exceptional durability and resistance to common issues like rot‚ warping‚ and insect damage – concerns frequently addressed when renovating homes listed on platforms like FINN.no in Norway.
This innovative siding mimics the aesthetic appeal of traditional wood lap siding‚ offering a classic look with enhanced performance. It arrives pre-primed‚ streamlining the painting or finishing process. HardiePlank’s cement-fiber composition provides superior fire resistance‚ adding an extra layer of safety to your property. Its longevity and low maintenance requirements make it a cost-effective choice for homeowners seeking a lasting and beautiful exterior solution‚ often sought after when upgrading properties advertised on FINN.no.
Benefits of HardiePlank Siding
HardiePlank siding offers a multitude of advantages for homeowners‚ mirroring the desire for quality and durability often seen in items listed for sale or trade on platforms like FINN.no. Its exceptional resistance to weather extremes – including harsh winters and intense sun – ensures long-lasting performance and minimizes maintenance. Unlike wood‚ it won’t rot‚ warp‚ or succumb to pest infestations.
Furthermore‚ HardiePlank boasts impressive fire resistance‚ enhancing home safety. Its aesthetic versatility allows for a wide range of design options‚ boosting curb appeal – a key factor when selling a property‚ as highlighted by listings on FINN.no. The pre-primed surface simplifies painting and finishing‚ saving time and effort. Ultimately‚ HardiePlank provides a beautiful‚ durable‚ and secure exterior solution‚ representing a valuable investment for any home.
Tools and Materials Needed
FINN.no listings demonstrate Norwegians value preparedness; for HardiePlank‚ you’ll require saws‚ nailers‚ safety gear‚ and‚ of course‚ the HardiePlank siding itself!
Essential Tools for Installation
Successfully installing HardiePlank siding demands a specific toolkit‚ mirroring the resourcefulness seen in FINN.no’s “gis bort” (give away) section for home improvement items. A circular saw‚ ideally fiber-cement specific‚ is crucial for accurate cuts. A pneumatic nailer‚ designed for siding‚ significantly speeds up the process and ensures proper fastener depth.
Beyond cutting and fastening‚ essential tools include a measuring tape‚ level (a laser level is highly recommended)‚ chalk lines for straight guides‚ and a utility knife for trimming. Safety is paramount; therefore‚ safety glasses‚ dust masks‚ and work gloves are non-negotiable. Don’t forget a hammer‚ speed square‚ and potentially a siding removal tool if replacing existing cladding. Having the right tools‚ much like finding a bargain on FINN.no‚ sets you up for success!
HardiePlank Materials Checklist
A comprehensive materials list is vital for a smooth HardiePlank installation‚ akin to carefully browsing listings on FINN.no to gather everything needed for a project. Naturally‚ you’ll require the HardiePlank siding itself‚ calculating square footage plus 10% for waste. Don’t forget starter strips‚ corner posts‚ and J-channel for windows and doors.
Fasteners are critical – use corrosion-resistant nails specifically designed for fiber cement. A high-quality moisture barrier is essential‚ as is appropriate flashing for windows‚ doors‚ and corners. Caulk‚ specifically exterior-grade‚ is needed for sealing. Finally‚ primer and paint (or pre-finished HardiePlank) complete the list. Like finding a complete furniture set on FINN.no‚ having everything upfront saves time and frustration!
Preparing for Installation
HardiePlank prep‚ similar to finding a renovation bargain on FINN.no‚ requires careful wall sheathing inspection and moisture barrier application for optimal results.
Inspecting the Wall Sheathing
Thoroughly inspect the existing wall sheathing before beginning HardiePlank installation. Just as you’d carefully examine furniture listed on FINN.no before acquiring it‚ assess the sheathing for any signs of damage‚ rot‚ or weakness. Replace any compromised sections with new sheathing material to ensure a solid and stable base for the siding.
Look for areas where water may have penetrated‚ causing swelling or delamination. Securely fasten any loose sheathing panels. The sheathing must be structurally sound to properly support the HardiePlank siding and withstand weather elements. Addressing these issues upfront prevents future problems and guarantees a long-lasting‚ beautiful finish‚ much like ensuring a solid foundation for a Norwegian home.
Moisture Barrier Installation
A properly installed moisture barrier is crucial for protecting your home‚ similar to safeguarding valuable items found on platforms like FINN.no from the elements. Overlap the moisture barrier horizontally‚ starting at the bottom of the wall‚ ensuring at least a 6-inch overlap with each successive layer.
Extend the barrier beyond the HardiePlank siding at the top and sides to allow for proper water runoff. Secure the barrier with staples or nails‚ ensuring it remains taut and wrinkle-free. This creates a vital shield against water intrusion‚ preventing mold growth and structural damage. Proper installation is paramount for long-term durability and maintaining the integrity of your home’s exterior.
Establishing a Level Starting Point
Achieving a perfectly level starting point is fundamental‚ much like accurately categorizing items for sale on a platform such as FINN.no ensures visibility. Begin by locating the lowest point of the wall using a level and straightedge. This will serve as your reference for establishing a consistent and visually appealing siding installation.
Mark this point and extend a level line across the entire wall. This line will guide the installation of the starter strip‚ ensuring the first row of HardiePlank siding is perfectly horizontal. Any deviation from level will become increasingly noticeable as you progress‚ impacting the overall aesthetic of your finished project. Precision at this stage is key!

HardiePlank Installation Process
Like finding deals on FINN.no‚ proper installation involves precise cutting‚ strategic fastener spacing‚ and careful overlapping of boards for a secure‚ lasting finish.
Cutting HardiePlank Siding
Cutting HardiePlank requires specialized tools and techniques to ensure clean‚ accurate cuts and prevent damage to the material. Unlike simply finding a sofa on FINN.no‚ this demands precision! Always use a fiber cement cutter‚ or carbide-tipped saw blades‚ as standard wood blades will quickly dull.
Scoring the material before cutting is crucial‚ especially for straight lines. This prevents chipping and cracking. When making angled cuts‚ utilize a miter saw with a carbide-tipped blade. Remember to wear safety glasses and a dust mask‚ as cutting HardiePlank generates significant dust. Accurate measurements are paramount; double-check all dimensions before making any cuts to avoid costly mistakes and ensure a professional-looking installation.
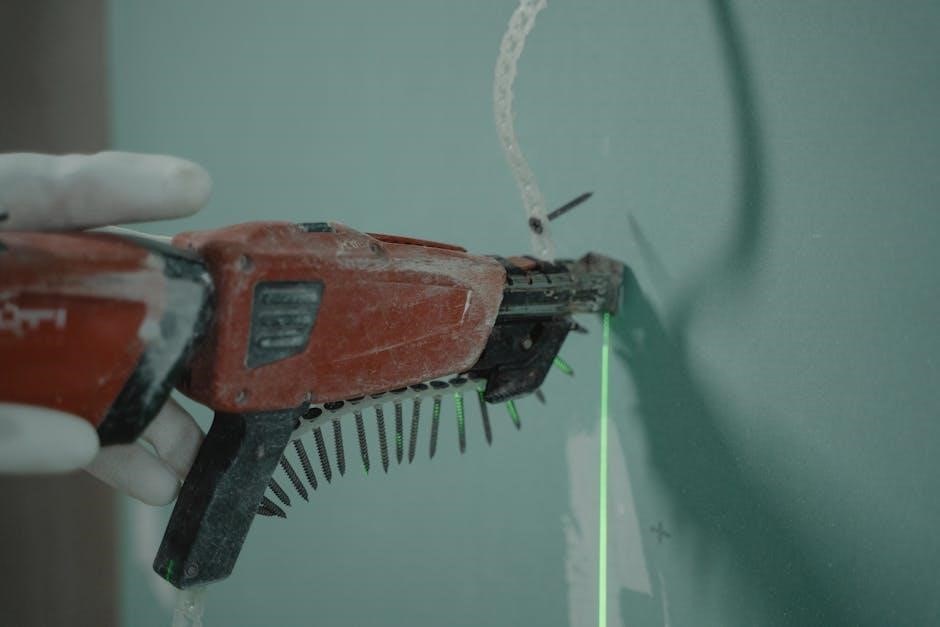
Fastener Selection and Spacing
Proper fastener selection is critical for a secure and long-lasting HardiePlank installation‚ much like ensuring a reliable vehicle found on FINN.no. Use corrosion-resistant fasteners specifically designed for fiber cement siding – stainless steel or coated screws are ideal. Avoid using nails‚ as they lack the holding power needed for this material.
Fastener spacing depends on the siding thickness and wind conditions. Generally‚ fasteners should be spaced 12 inches apart along the edges and 16 inches apart in the field. Always follow the manufacturer’s recommendations for specific spacing guidelines. Ensure fasteners are driven straight and flush with the siding surface‚ avoiding overdriving‚ which can damage the material. Correct spacing guarantees stability and prevents warping;
Installing Starter Strip
The starter strip is fundamental‚ acting as the foundation for your HardiePlank installation – similar to a solid base when finding a home on FINN.no. It establishes a level starting point and ensures proper alignment for subsequent courses. Install the starter strip along the bottom edge of the wall‚ ensuring it’s perfectly level using a spirit level.
Fasten the starter strip securely to the wall sheathing with appropriate corrosion-resistant fasteners‚ spaced according to the manufacturer’s instructions. Pay close attention to maintaining a consistent reveal (the amount the siding overlaps the starter strip). A properly installed starter strip prevents moisture intrusion and provides a clean‚ professional finish. Double-check for levelness before proceeding.
Overlapping and Staggering Boards
Achieving a weather-tight and visually appealing HardiePlank installation relies heavily on correct overlapping and staggering techniques – much like carefully browsing listings on FINN.no to find the perfect fit. Overlap each successive course of siding over the previous one‚ following the manufacturer’s recommended exposure. This overlap prevents water from penetrating behind the siding.
Stagger the end joints of each row to avoid creating continuous vertical seams. This enhances the structural integrity and aesthetic appeal. Aim for a minimum stagger of 6 inches. Proper staggering distributes stress and minimizes the risk of cracking. Ensure consistent exposure and stagger throughout the entire installation for a professional‚ durable finish.
Flashing and Weatherproofing
Like securing a good deal on FINN.no‚ proper flashing around windows and doors is crucial for preventing water damage and ensuring longevity.
Window and Door Flashing
Effective window and door flashing is paramount during HardiePlank installation‚ mirroring the careful consideration Norwegians apply when listing items on FINN.no. This critical step prevents water intrusion‚ protecting the structural integrity of your home. Begin by applying a self-adhered waterproof membrane around the window or door opening‚ extending onto the HardiePlank siding.
Ensure the flashing overlaps all sides of the opening‚ creating a watertight seal. Integrate the flashing with the weather-resistant barrier already installed on the wall sheathing. Pay close attention to corners and seams‚ using flashing tape to reinforce these vulnerable areas. Proper flashing isn’t merely an addition; it’s a foundational element‚ much like a detailed listing on FINN.no‚ ensuring a successful outcome and preventing costly repairs down the line.
Corner Post Installation & Flashing
Installing HardiePlank corner posts requires precision‚ similar to the detailed categorization used on FINN.no when listing items for sale. Begin by ensuring the corner posts are plumb and securely fastened to the wall framing. Utilize appropriate corrosion-resistant fasteners‚ spaced according to HardiePlank’s specifications.
Crucially‚ incorporate flashing around the corner posts to prevent water penetration. Apply a flexible flashing material that extends beyond the corner post on both sides‚ overlapping the siding. Seal all seams and edges with a high-quality exterior caulk. Proper corner post installation‚ coupled with effective flashing‚ creates a durable and weather-resistant finish‚ much like a well-presented advertisement on FINN.no attracts attention and value.
Proper Sealing Techniques
Achieving a watertight HardiePlank installation‚ akin to a successful transaction on FINN.no‚ relies heavily on proper sealing. Utilize a premium‚ 100% silicone sealant specifically designed for exterior use. Apply sealant generously to all joints‚ gaps‚ and around windows and doors‚ ensuring complete coverage.
Pay close attention to areas where HardiePlank meets different materials‚ like trim or flashing. Backer rod can be used in larger gaps before applying sealant. Regularly inspect the sealant for cracks or deterioration‚ and reapply as needed. Effective sealing prevents moisture intrusion‚ protecting the structure and maintaining the siding’s integrity‚ mirroring the careful detail Norwegians employ when listing items on FINN.no.

Finishing Touches
Like presenting a well-maintained item on FINN.no‚ caulking and trim enhance HardiePlank’s appearance. Painting or finishing protects and beautifies the siding.
Caulking and Trim Installation
After HardiePlank siding installation‚ meticulous caulking is crucial for a weatherproof seal. Focus on areas around windows‚ doors‚ and corners – similar to presenting a flawless item on FINN.no to attract buyers. Use a high-quality‚ paintable caulk specifically designed for exterior use‚ ensuring it remains flexible with temperature changes.
Trim installation adds a polished look and further protects the siding edges. Choose a trim material compatible with HardiePlank‚ such as PVC or pre-finished wood. Secure the trim with appropriate fasteners‚ ensuring proper spacing and alignment. Pay close attention to detail‚ as these finishing touches significantly impact the overall aesthetic and longevity of your HardiePlank installation. A neat finish‚ like a well-described ad‚ is key!

Painting or Finishing HardiePlank
HardiePlank comes pre-primed‚ ready to accept your chosen finish‚ much like preparing an item for sale on FINN.no. Use 100% acrylic latex paint specifically formulated for cement fiber siding. This ensures proper adhesion‚ flexibility‚ and color retention. Apply at least two coats for optimal coverage and durability‚ following the manufacturer’s recommendations for application temperature and drying times.
Alternatively‚ you can explore pre-colored HardiePlank options‚ eliminating the need for painting. If painting‚ choose lighter colors to minimize heat absorption and potential warping. Proper surface preparation is vital – clean the siding thoroughly before painting. A quality finish not only enhances the appearance but also protects the siding from the elements‚ extending its lifespan‚ similar to protecting a valuable item.

Troubleshooting Common Issues
Like finding solutions on FINN.no‚ address cracks with patching compounds‚ moisture issues with proper flashing‚ and installation errors promptly for lasting results.
Dealing with Cracks and Damage
Minor cracks in HardiePlank siding‚ much like finding a slightly damaged item on a platform like FINN.no‚ are relatively common and often easily addressed. Typically‚ these cracks stem from impact during handling or settling after installation; For hairline cracks‚ a high-quality exterior-grade patching compound specifically designed for fiber cement is recommended. Ensure the area is clean and dry before application‚ and follow the manufacturer’s instructions carefully.
Larger cracks or damage‚ however‚ may necessitate replacing the affected plank. Carefully cut out the damaged section using appropriate fiber cement cutting tools‚ ensuring a clean and straight edge. When replacing‚ maintain the proper overlap and staggering pattern‚ similar to carefully selecting a replacement part. Proper sealing around the new plank is crucial to prevent moisture intrusion‚ mirroring the attention to detail needed when evaluating items on a marketplace.
Addressing Moisture Problems
Moisture is the primary enemy of any siding‚ and HardiePlank is no exception. Similar to inspecting items listed as “gis bort” (give away) on FINN.no for hidden flaws‚ diligent inspection is key. Improper flashing around windows and doors is a common entry point for water. Ensure all flashing is correctly installed and sealed‚ preventing water from penetrating the wall sheathing.
Furthermore‚ check for gaps in the siding or around fasteners. Recaulk any compromised areas with a high-quality exterior sealant. Proper ventilation behind the siding is also vital; it allows moisture to escape‚ preventing rot and mold growth. Addressing these issues promptly‚ like quickly responding to a good deal online‚ will protect your investment and maintain the siding’s integrity.
Correcting Installation Errors
Discovering installation errors can be frustrating‚ much like finding an unexpected issue with an item on FINN.no. Incorrectly spaced fasteners can lead to bulging or cracking. Remove the improperly placed fasteners and reinstall them according to the manufacturer’s specifications. Improper overlapping or staggering of boards creates weak points and potential water intrusion areas.
Carefully remove the affected boards and reinstall them with the correct overlap. If cuts are uneven or inaccurate‚ replacement may be necessary. Always prioritize a secure and watertight installation. Remember‚ addressing errors promptly prevents further damage and maintains the siding’s aesthetic appeal and protective qualities‚ similar to quickly fixing a listing on a marketplace.

Leave a Reply